PiCoder - Raspberry Pi Pico Learning Kit: A Comprehensive Guide to Learning Electronics and Programming
The PiCoder - Raspberry Pi Pico Learning Kit is a fantastic resource for anyone learning electronics and programming.

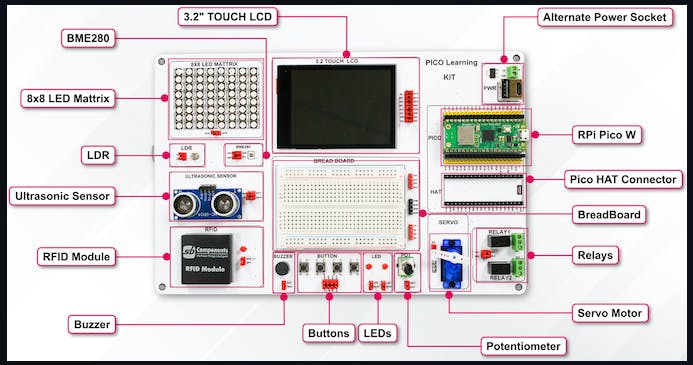
The PiCoder is a comprehensive learning kit that comes packed with a wide range of components, including a Raspberry Pi Pico W on the header, half-size breadboard, LCD screen, 8x8 RGB LED matrix, light-dependent resistor, BME280 temperature, pressure and humidity sensor, HC-SR04 ultrasonic sensor, RFID reader, buzzer, four buttons, two LEDs, potentiometer, servo, two relays, HAT breakout, and USB C power input.
PiCoder's LED Blinky - Introduction
PiCoder's LED Blinky Project is the perfect way to learn about electronics and programming while creating something fun and eye-catching. With this project, you'll use a Raspberry Pi Pico microcontroller and a variety of electronic components to create your own LED light show. The step-by-step instructions make it easy for beginners to follow along and learn at their own pace. Plus, with the skills you learn from this project, you'll be able to create even more exciting projects in the future.
Get ready to shine with PiCoder's LED Blinky Project! Below are the steps:
Let’s get started with the very first project Led Blinking with PiCoder. A compact and comprehensive Raspberry Pi Pico W-based Learning Kit having onboard actuators, sensors, and LEDs makes learning enjoyable.
Installing Thonny IDE:
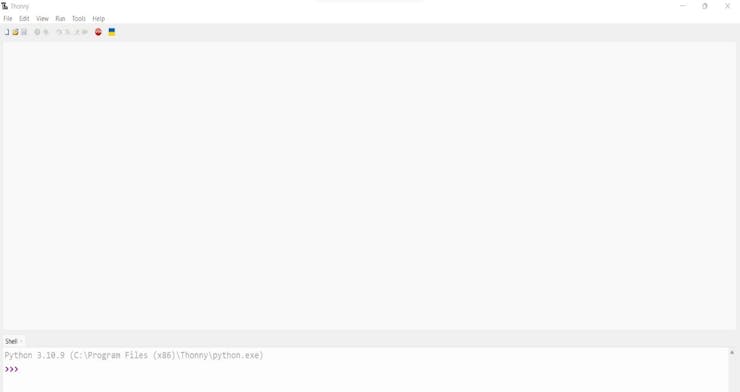
Download Thonny IDE from the Download link as per your OS and install it. Open the Thonny IDE application whose windows look as shown in the image

Connect PiCoder to your PC/laptop using a micro USB cable and select a board with a suitable com port as shown in the below figure.
You have two options click on the bottom right corner of thonny IDE to select the board and relevant port OR
select Run > configure Interpreter > board and port
Coding:
Once every step is done then we can start coding our PiCoder. Write the below code in Thonny IDE or download Led_Blink.py file and open in Thonny IDE.
from time import sleep
from machine import Pin
led1 = Pin(28, Pin.OUT) # LED connected to GPIO 28 pin of pico on PiCoder
led2 = Pin(14, Pin.OUT) # LED connected to GPIO 14 pin of pico on PiCoder
while 1:led1.value(1) # turn ON led 1
led2.value(1) # turn ON led 2
print("LEDs ON")
sleep(3)
led1.value(0) # turn OFF led 1
led2.value(0) # turn OFF led 2
print("LEDs OFF")
sleep(1)Result Time...
Check out the whole process of project Led Blinking with PiCoder in the video below and discover how easy it is to create your own blinking LED project using a PiCoder. Follow along with the step-by-step instructions as PiCoder guides you through each stage of the process, from setting up your PiCoder to writing your first lines of code. With clear explanations and helpful tips, this video makes it simple to create a fun and interactive project. So what are you waiting for? Check out the video below and start blinking those LEDs today!
Here are some of the uses and applications of this learning kit:
- Learn electronics: With the PiCoder kit, you can learn about electronics, circuits, and programming in a fun and interactive way.
- Raspberry Pi Pico: The kit comes with a Raspberry Pi Pico microcontroller, which is a powerful and versatile microcontroller that can be used for a wide range of applications.
- Wide range of components: The kit includes a wide range of electronic components, with such a diverse range of components, learners can explore the basics of electronics and coding while learning about sensors, input/output devices, and other essential hardware concepts. This kit is ideal for students, hobbyists, and makers who want to explore the basics of electronics, coding, and robotics.
- Multiple projects: The PiCoder is built around the Raspberry Pi Pico W, which is removable and upgradeable. If a newer model is released, learners can easily upgrade their kit by swapping out the Pico with the latest version. This feature ensures that the PiCoder is future-proof, allowing learners to continue their exploration of electronics and coding as new technologies emerge.
- Open-source software: The kit uses open-source software, which means that you can modify and customize the software to suit your needs.
- Real-world applications: The skills you learn with the PiCoder kit can be applied to real-world applications, such as building your own smart home devices, robotics projects, and more.
Overall, the PiCoder - Raspberry Pi Pico Learning Kit is an excellent resource for anyone learning about electronics and programming. With its step-by-step instructions, a wide range of components, and real-world applications, it's the perfect tool for beginners and enthusiasts alike.


